Hey folks! I ran into an interesting situation with a customer the other day. They are using Tanzu Mission Control (TMC) with their kubernetes clusters and are trying to migrate from EKS to Tanzu Kubernetes (TKG) Clusters. I’m going to totally ignore the relative merits of EKS vs TKG and go straight to the how of the migration.
The rest of this article is going to talk about how to use kubectl, the velero cli, and TMC to migrate workloads from one cluster to another using Velero’s backup and restore functionality. I hope this is interesting and if you have anything else you’d like to hear about please ping me on twitter or Linkedin.
Thanks!
The Set Up
- The TKG cli
- v1.2.0
- 2 TKG clusters
- Called mine workload1 and workload2 cause I’m super creative
- Joining the clusters to TMC is out of scope for this article
- Look here if you’d like an article on that
- Access to Tanzu Mission Control
- See your friendly neighborhood vmware salesperson
- The Velero cli
- v1.4.2
- kubectl
- v1.19.3
- The helm cli
- v3.1.2
- An app to migrate
- We’ll be deploying wordpress from the Bitnami helm repository
Getting things ready
First thing’s first, lets deploy a wordpress instance using the well built and well currated helm charts from the good folks over at Bitnami. You can dig into them in more detail here.
In the code block below you’ll see the steps to add the bitnami helm repo and install wordpress in it’s own namespace.
# Add the helm repo if needed
helm repo add bitnami https://charts.bitnami.com/bitnami

# Update to be sure you have the latest charts
helm repo update

# Lookup wordpress
helm search repo wordpress

# Checkout the chart values
helm show values bitnami/wordpress | less

## We're going to override the blog name and the service type which you can find in the values file as wordpressBlogName and service.type.

# Create our new namespace
kubectl create ns wordpress

# Deploy wordpress
## use -n to set the namespace and use --set to override the variables we identified in the values file.
helm install new-blog bitnami/wordpress -n wordpress --set wordpressBlogName=new-blog --set service.type=ClusterIP
Take a second here and browse to your wordpress page. It should look something like this:
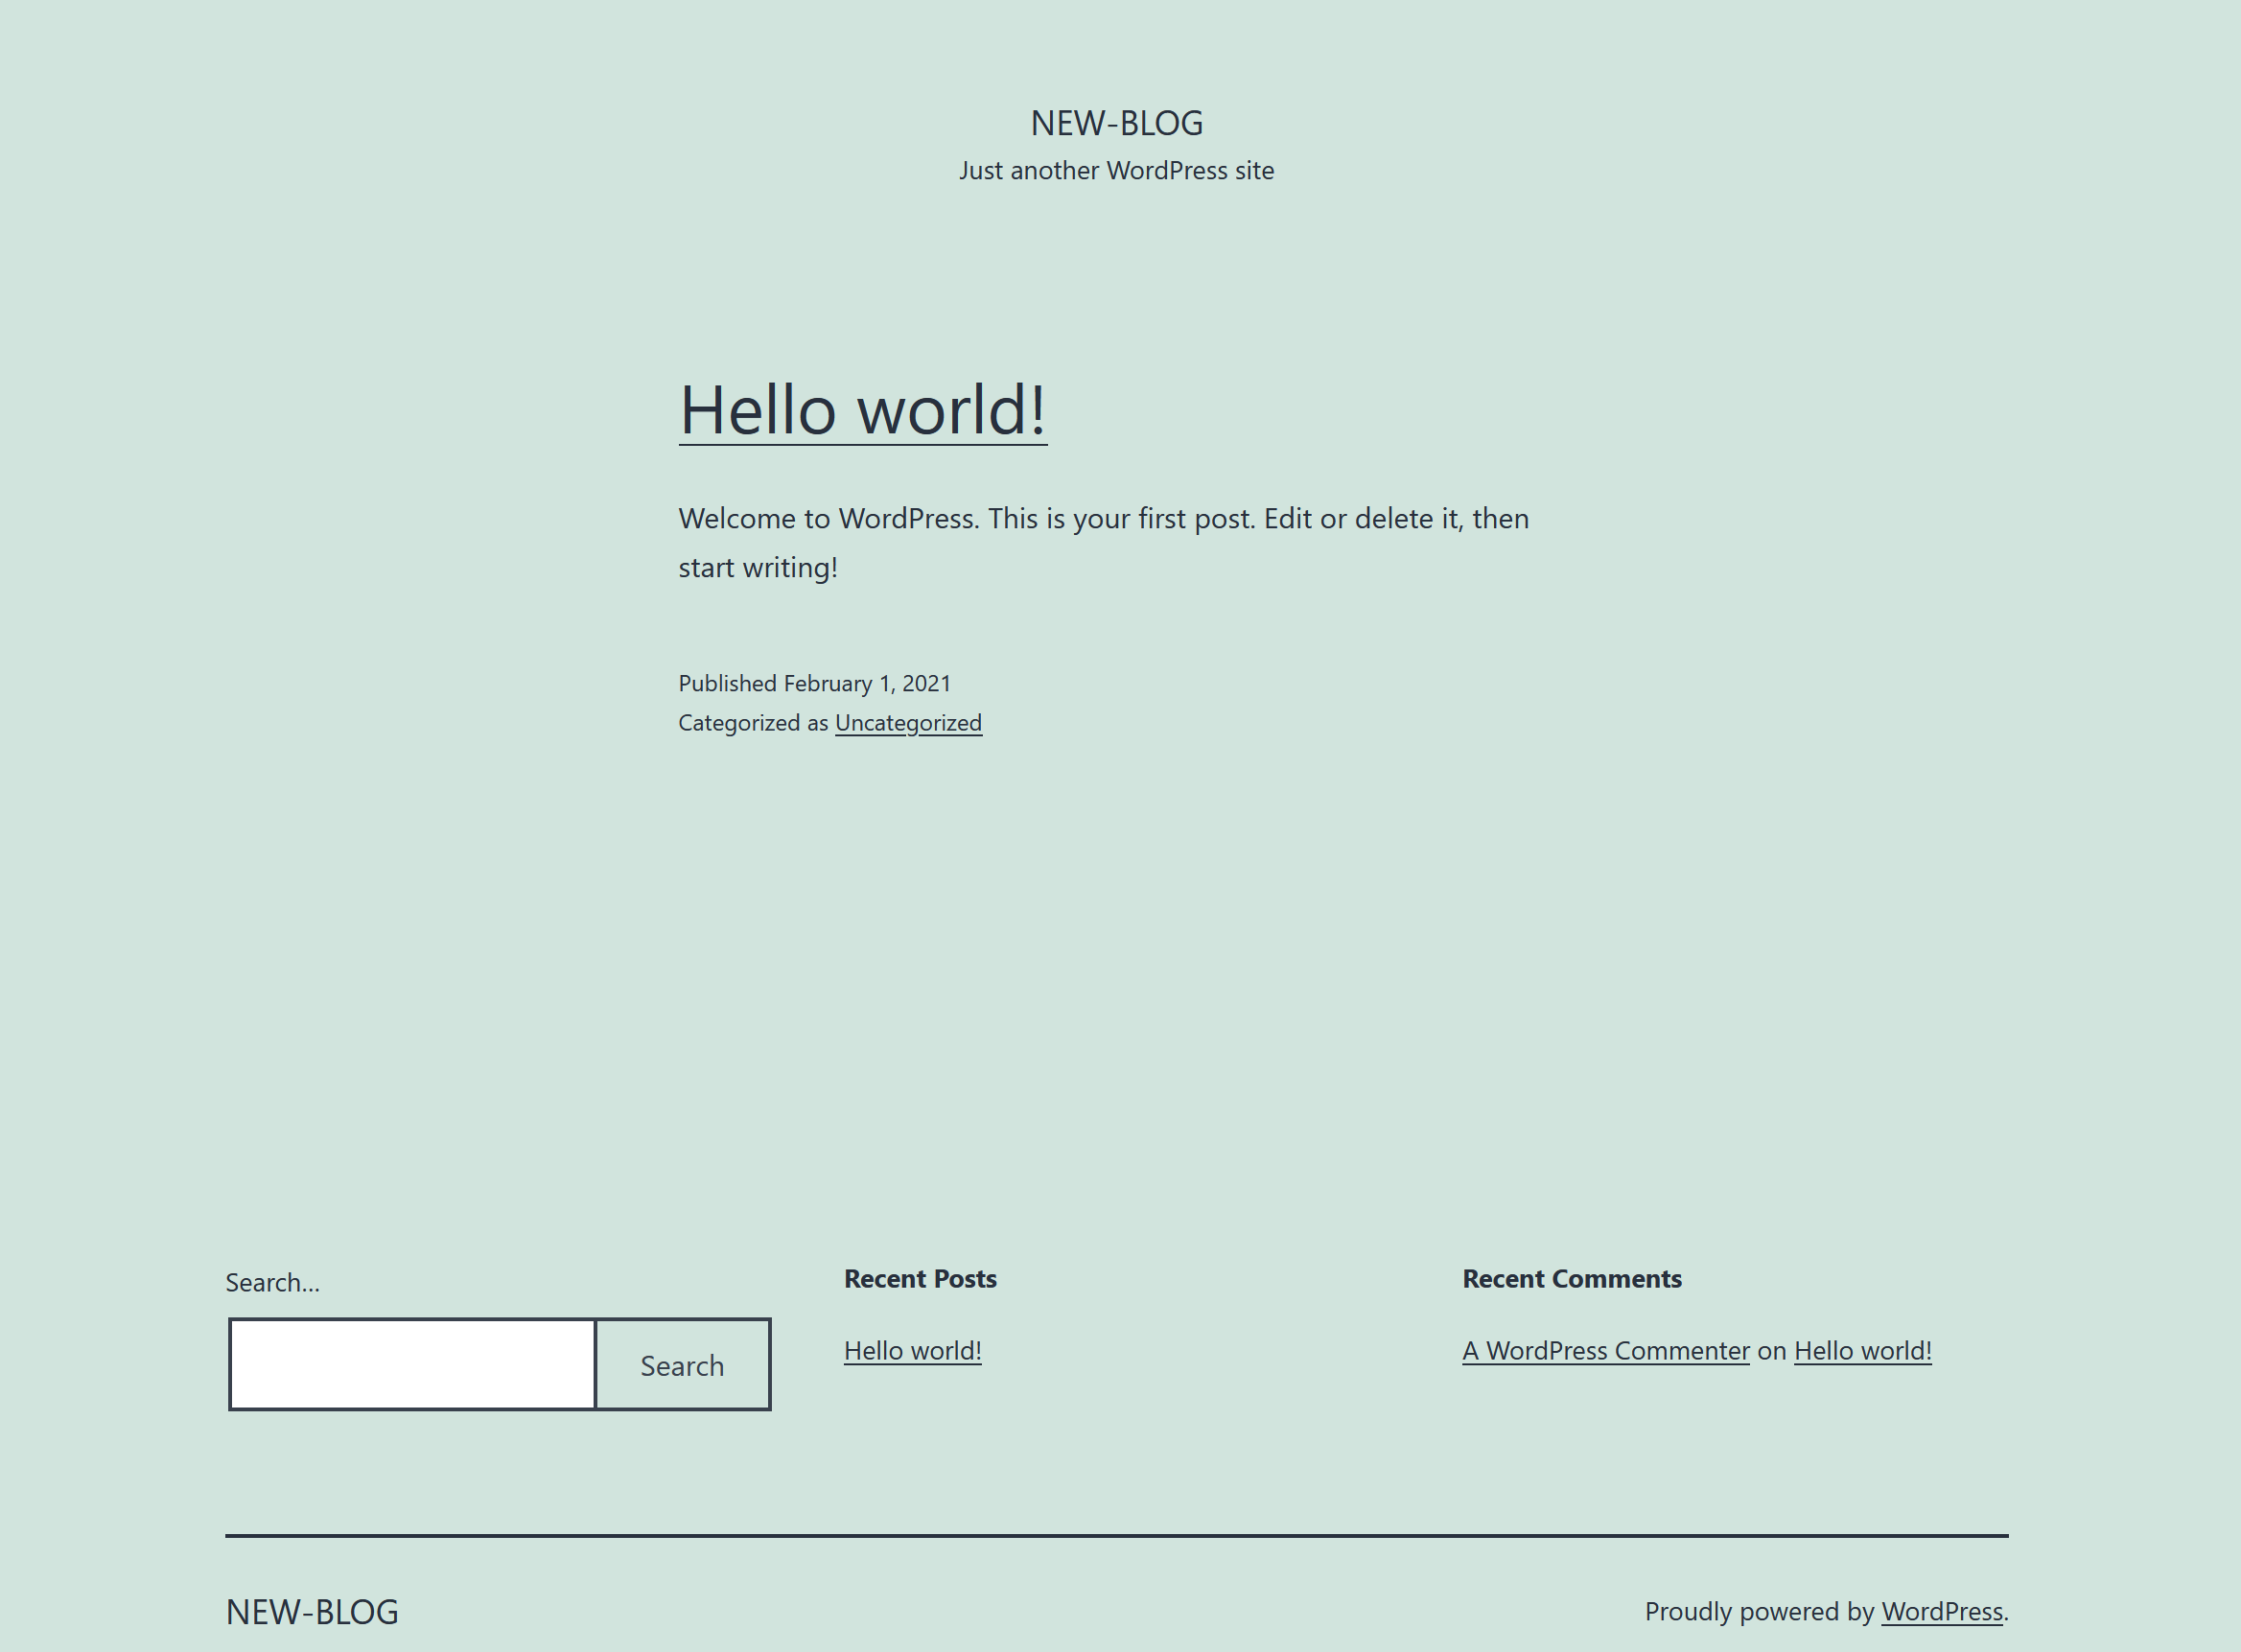
If you’re having trouble getting access to the page here’s the port-forward command I used: kubectl port-forward svc/new-blog-wordpress 8080:80 -n wordpress. The site will now be available at localhost:8080.
Backing it up
Quick disclosure here: Everything I’m telling you to do in the TMC console can be done instead via kubectl and the Velero cli. I’m not covering any of that in this article.
Enroll in Data Protection
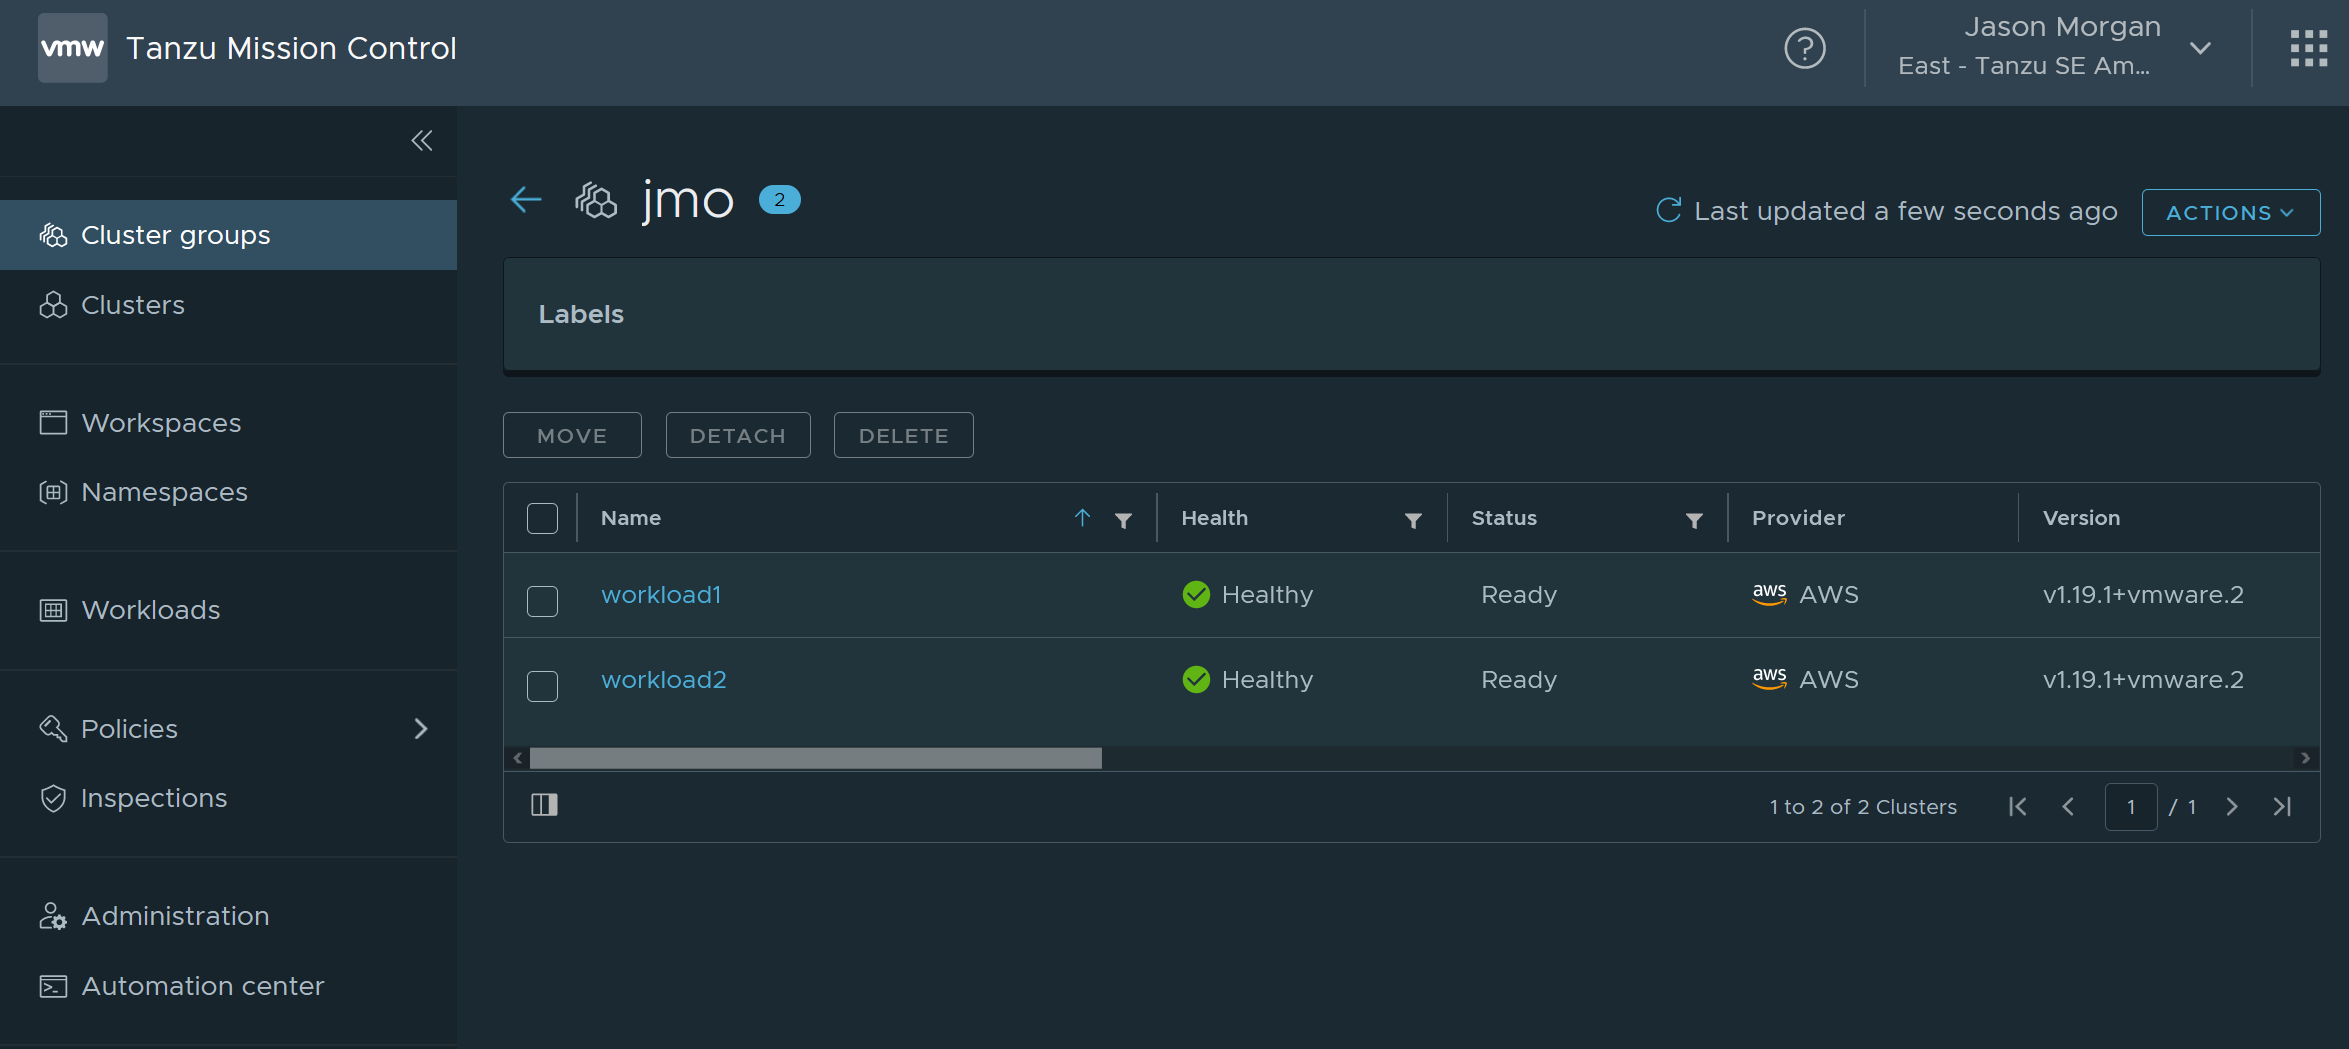
Head over to your cluster group and find your clusters.
Once again I’m going to save everyone a little time and point you at the vmware docs for enabling data protection on your clusters. It’s a fairly painless process and VMware gives you an easy to use cloud formation template to get the environment set up.
You want to ensure you have data protection enabled on both clusters.

Run a Backup
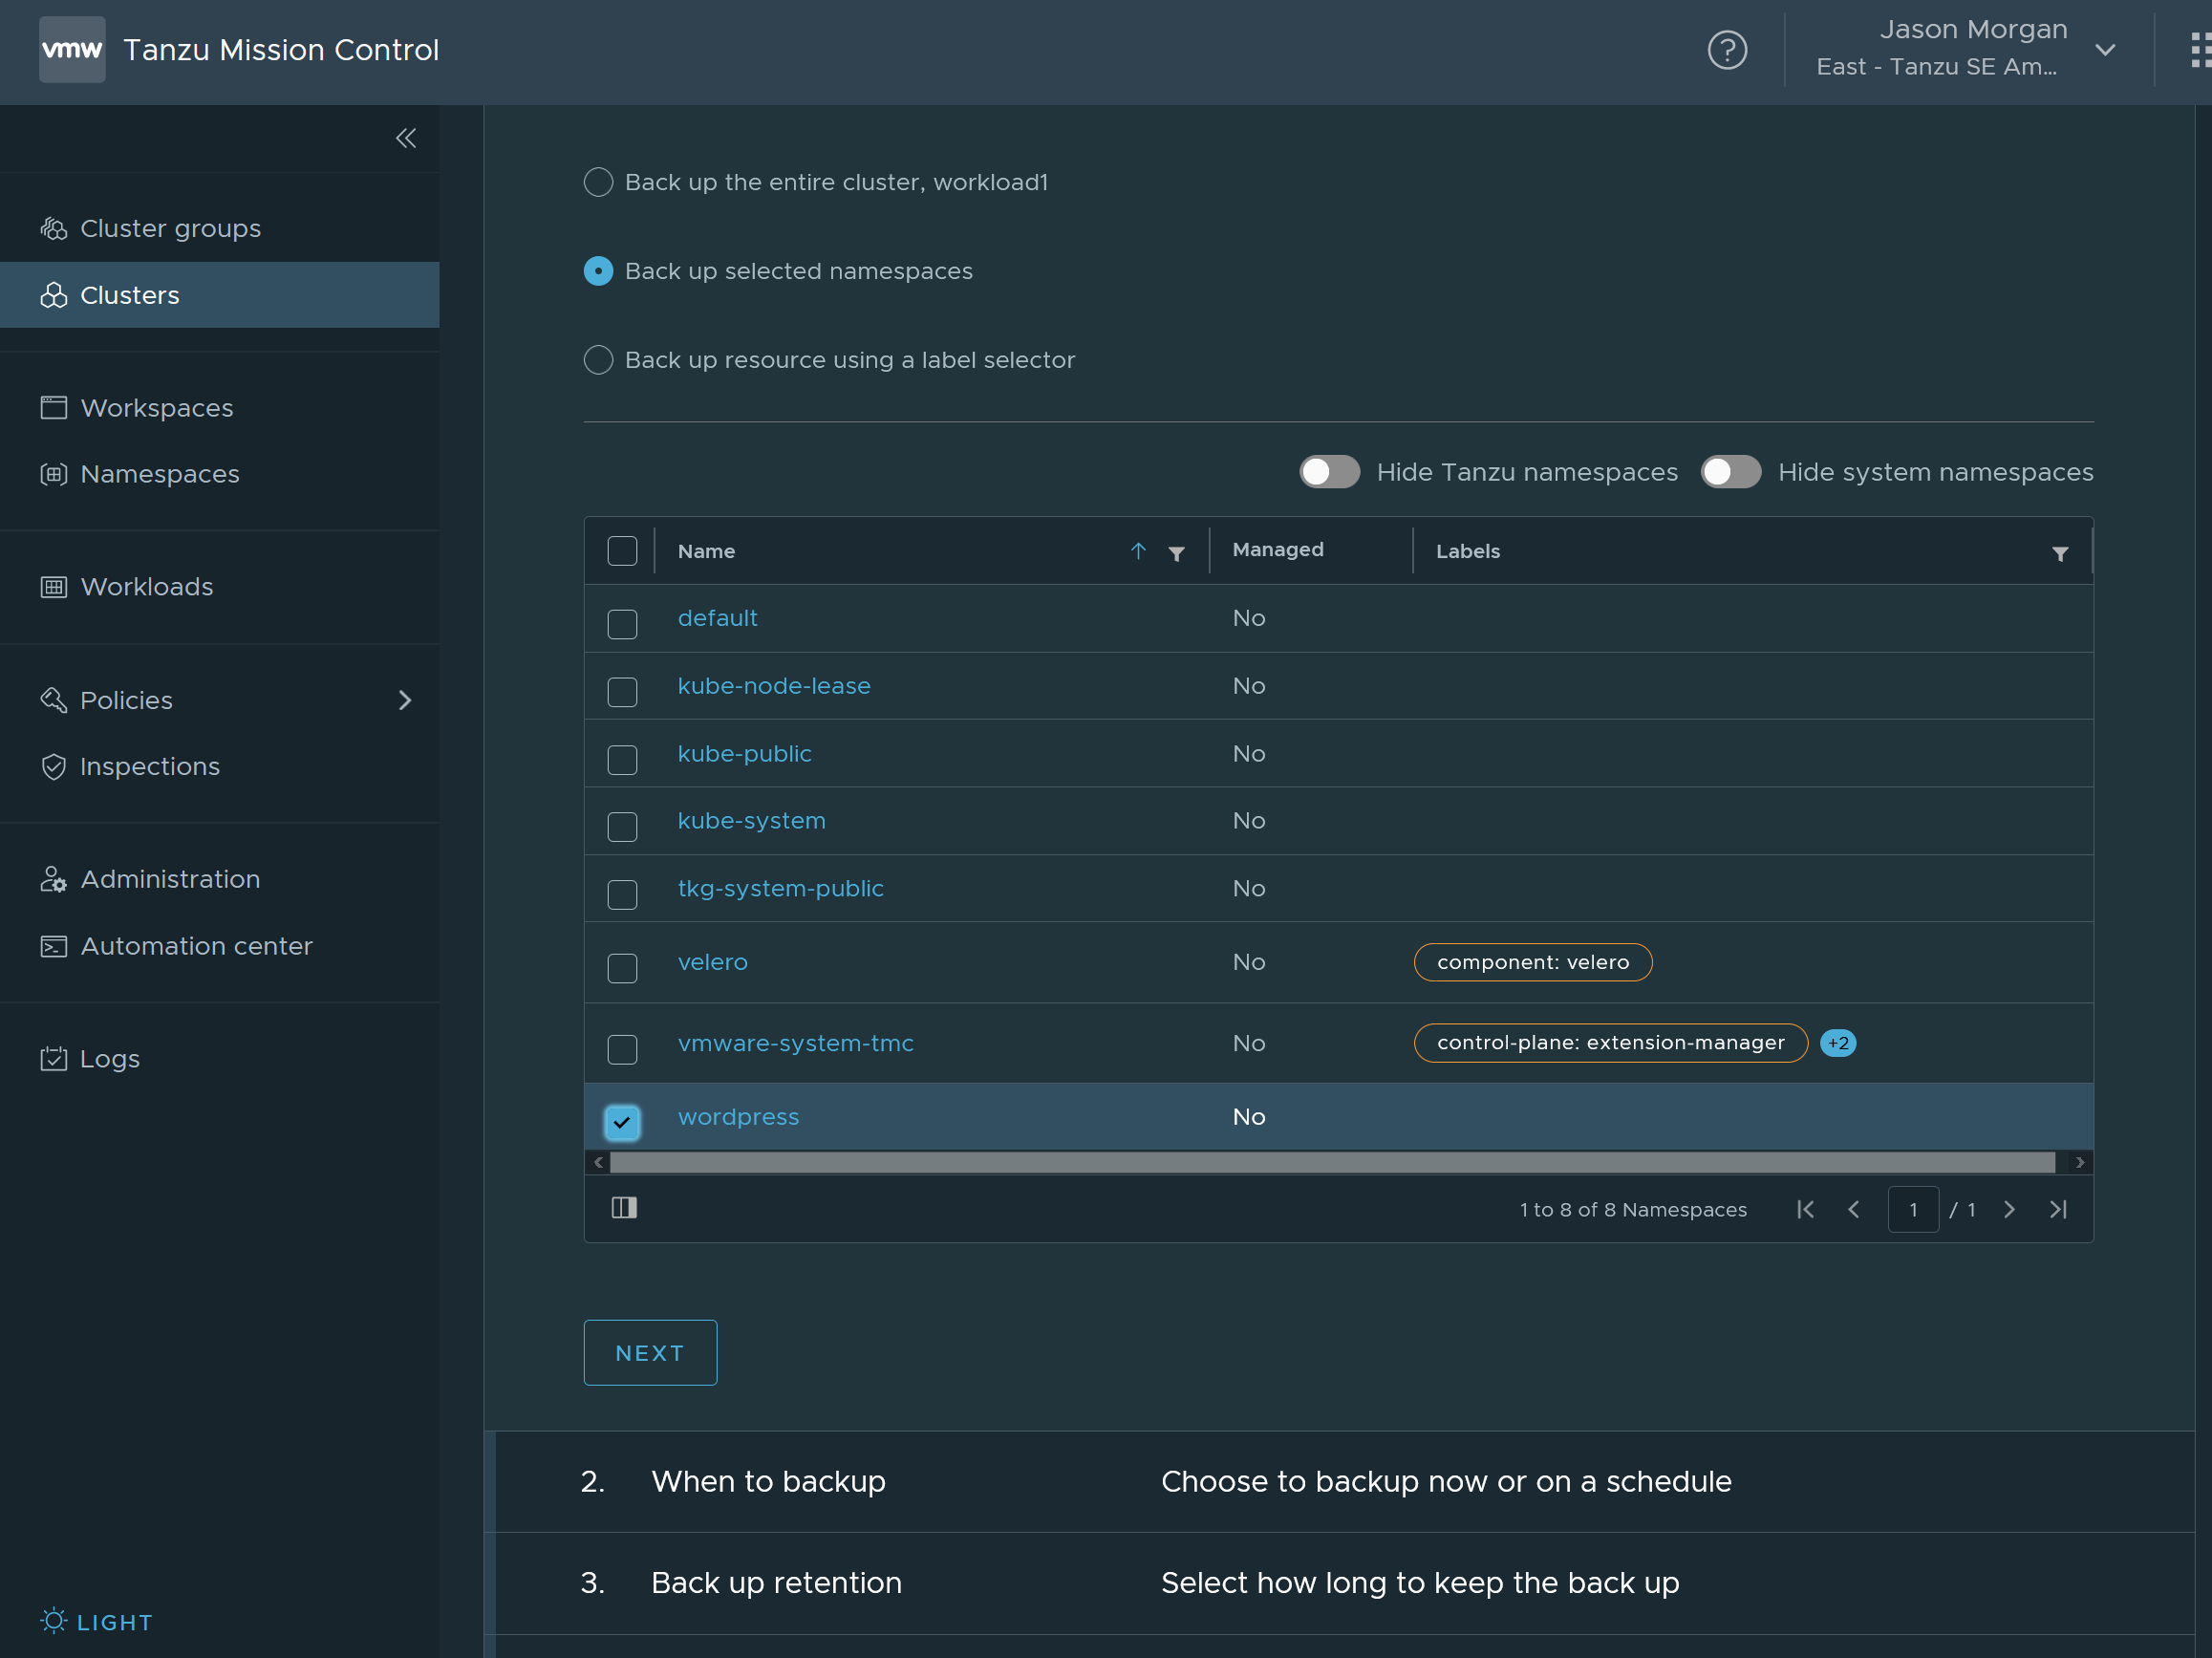
In the TMC console you need to select your cluster, in my case workload1 and head over the the data protection tab. From there you can schedule a backup and you have a few options. Feel free to do full or by namespace, I selected my wordpress namespace from before so I could simplify my restore.
Once you have that done validate that your backup.
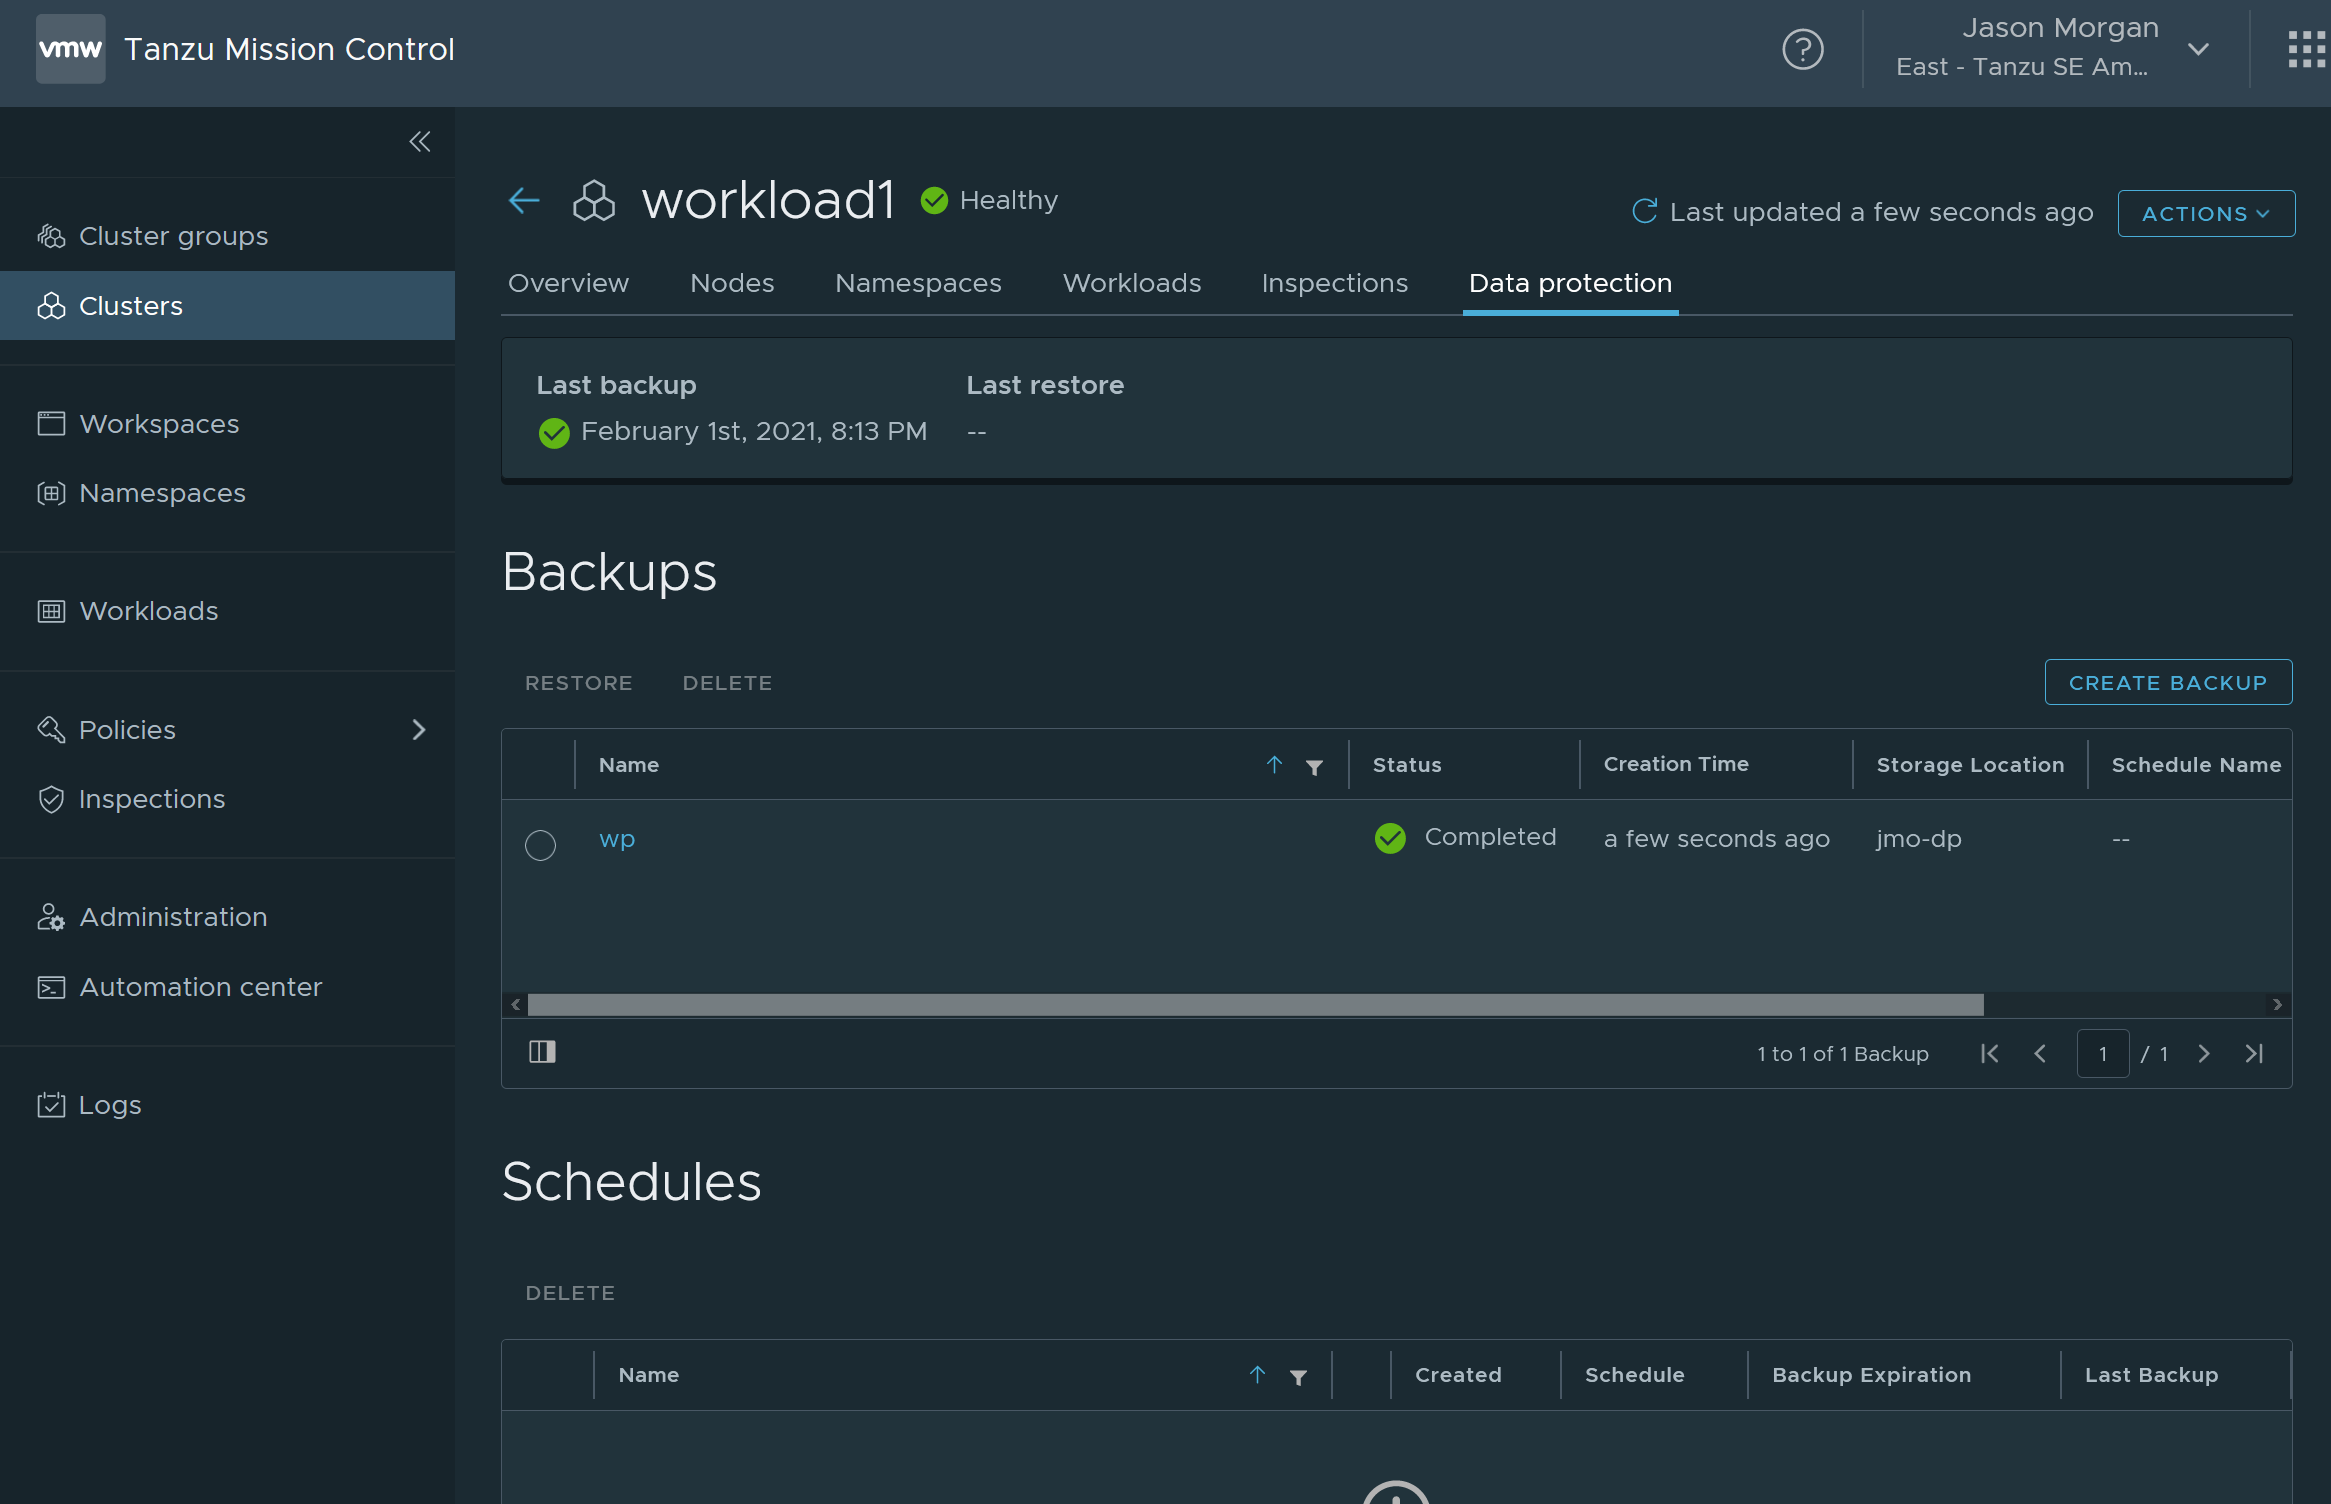
With that we have our starting point for migrating our wordpress blog from one cluster to another! The next section will have us heading back to the cli.
Migrating
I start out doing a quick check that velero is installed on my cluster and validate my versions at the same time.
$ velero version
Client:
        Version: v1.4.2
        Git commit: 56a08a4d695d893f0863f697c2f926e27d70c0c5
Server:
        Version: v1.4.2
Seeing that tells me velero is good to go. Make sure you checkout each cluster before moving on.
Finding the Backup
Going to take a quick detour and talk about kubernetes custom resource definitions (CRDs) and how they relate to tools that integrate with the kubernetes api. CRDs are a handy way to extend kubernetes and allow apps like velero to build their own constructs right into the cluster. You’re going to see examples using both kubectl and the velero cli to perform various tasks.
With that in mind we’re going to explore the kubernetes API to find our backup and figure out how we can get our target cluster, workload2, to see the backup of the source cluster, workload1. When you look at the clusters, in either the TMC console or the cli, you’ll only see backups on the source cluster. We’ll dive into that in the next section.
Velero Contructs
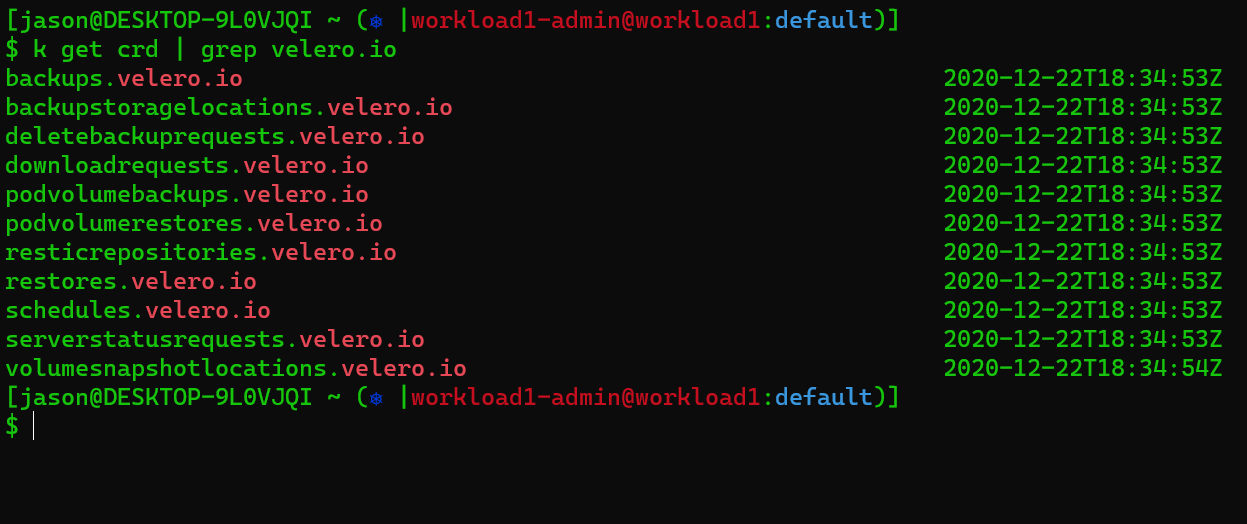
Velero is going to create a bunch of new object types but we’re really only interested in 2 at this point. Backups, and Backup Storage Locations. You can see a bit more by running the following command: k get crd | grep velero.io
Backups
Neither construct is particularly complicated. Backups are just that, and they’re stored, and retrieved from, backup locations. We can see when we ask our clusters about backups workload1, the source cluster, sees a backup called wp. The backup wp represents the wordpress blog we want to move from workload1 to workload2. Unfortunately for us only our source cluster can see it for now. You can explore the clusters witht eh following commands.
# With the velero cli
velero backup get

# via kubectl
kubectl get backups -n velero
## Velero puts it's backups and other things in the velero namespace by default
You can see from the output that the backup is only visable from workload1. We’re going to checkout the backup locations and see what we can do about it.

Backup Locations
Looking at the screen grab you can see my storage location for wp is listed as jmo-dp. In fact when we look at both workload1 and workload2 they each have a backup location called jmo-dp but when you dig deeper you see that the values for each don’t line up.
# getting the backup location via velero
velero backup-location get

# getting the backup location via kubectl
kubectl get backupstoragelocations.velero.io -n velero
If you run the velero cli version of that command you’ll see something like the image below and you’ll note that while the s3 bucket name is the same the prefix the backup gets stored at are different.

Going to go ahead and spoil any remaining mystery we have at this point. In order to get our cross cluster restore working we need to copy over our backup location from workload1 to workload2. When you dig into the backup storage location on workload1 you’ll see an object that looks a lot like this:
# The below yaml has been modified to drop non required fields
apiVersion: velero.io/v1
kind: BackupStorageLocation
metadata:
  name: jmo-dp
  namespace: velero
spec:
  config:
    bucket: vmware-tmc-1234
    profile: jmo-dp
    s3ForcePathStyle: "false"
  objectStorage:
    bucket: vmware-tmc-1234
    prefix: 01ET5VEFZTES40MAJYZ98MC6G6/
  provider: aws
In order to successfully do a cross cluster restore we need to create a new backup location on workload2 and add new credentials to the velero cloud config secret.
Creating our Objects
Checkout the Velero docs here. This is a good place to start but in order to get this working I also needed to look at the aws backup plugin. After diving in there you see that the value under spec.config.profile refers to the aws credentials that velero will use to access the backups.
Let’s create a new backup location object on workload2. I’m going to show an example using my cluster config but you need to get the appropriate values from your own source and target clusters.
apiVersion: velero.io/v1
kind: BackupStorageLocation
metadata:
  name: source-cluster # renamed from jmo-dp, this is will represent the source for our cross cluster restore.
  namespace: velero
spec:
  config:
    bucket: vmware-tmc-1234
    profile: source-creds # renamed from jmo-dp, this will represent a new entry in the cloud-config secret.
    s3ForcePathStyle: "false"
  objectStorage:
    bucket: vmware-tmc-1234
    prefix: 01ET5VEFZTES40MAJYZ98MC6G6/
  provider: aws
Once you have your backup location object made and saved, I called mine backupLocation.yaml, you can apply it to your target cluster, workload2. So to be extra clear here, we are creating a backup location object on workload2 based on the jmo-dp backup location from workload1. You can create the new object any way you like, I did it by running `kubectl apply -f backupLocation.yaml. You can explore the new backup location in workload2 but you’ll quickly see in the velero logs that it doesn’t have permission to access backups. To get that working we need to migrate the backup credentials from workload1 over to workload2.
Migrating Credentials
In order to use workload1’s backup we need to update workload2’s cloud-credentials, the secret velero uses to backup and restore clusters. You can view your cloud-credentials secret like this kubectl get secret cloud-credentials -n velero -o json | jq -r .data.cloud | base64 -d && echo and you’ll see some output like:
# I replaced all my values, expect to see real information in your output
[jmo-dp] # this is the credential name you referenced in the backup location object
aws_access_key_id=ACCESS_KEY_ID
aws_secret_access_key=ACCESS_KEY_SECRET
aws_session_token=SUPER_LONG_TOKEN

[default]
aws_access_key_id=ACCESS_KEY_ID
aws_secret_access_key=ACCESS_KEY_SECRET
aws_session_token=SUPER_LONG_TOKEN
We’re going to add the values from workload1, our source cluster, under a new heading, source-creds. So here we’re going to do a little credential surgery and create a new entry in this file, base64 encode it, and then replace the cloud-credentials secret. It’s not exactly an easy or seemless process but I expect VMware is going to work on making cross cluster restores easier in a future version of TMC.
Updating Creds
In order to update the secret I did the following:
# Start by getting the cloud credentials for each cluster.
# Pipe the credentials from workload2 to a creds.txt file
kubectl get secret cloud-credentials -n velero -o json | jq -r .data.cloud | base64 -d > creds.txt

## Edit the file and add an entry to it under the name [source-creds] this should be the jmo-dp value from workload1
vim creds.txt
Example data:
[source-creds] # Our new entry
aws_access_key_id=ACCESS_KEY_ID_FROM_WORKLOAD1
aws_secret_access_key=ACCESS_KEY_SECRET_FROM_WORKLOAD1
aws_session_token=SUPER_LONG_TOKEN_FROM_WORKLOAD1

[jmo-dp] # this is the credential name you referenced in the backup location object
aws_access_key_id=ACCESS_KEY_ID_FROM_WORKLOAD2
aws_secret_access_key=ACCESS_KEY_SECRET_FROM_WORKLOAD2
aws_session_token=SUPER_LONG_TOKEN_FROM_WORKLOAD2

[default]
aws_access_key_id=ACCESS_KEY_ID_FROM_WORKLOAD2
aws_secret_access_key=ACCESS_KEY_SECRET_FROM_WORKLOAD2
aws_session_token=SUPER_LONG_TOKEN_FROM_WORKLOAD2
Then we’re going to re-encode it and update our secret on workload2.
# Re encode your credentials
## You can do this anyway you like as long as the data is good, adding my method in case you just want to follow along.
cat creds.txt | base64 | tr -d '\n'

## I have a clipboard utility so I really ran
cat creds.txt | base64 | tr -d '\n' | clip

# On our workload2 cluster
kubectl edit secret -n velero cloud-credentials
## delete the string in the data.cloud section of the secret and replace it with the base64 string from above.
EDITORS NOTE Watch that your AWS token didn’t expire. In the time it took me to write and test this process I had to get a new token and re edit the cloud-credentials secret.
With that done let’s run some commands on workload2 to see if our new backup location is configured correctly and available.
# Show your backups
velero backup get

# via kubectl
kubectl get backups -n velero
Running the Restore
Now that we’re happy with the velero config we’re heading back to the TMC console to handle the restore. Again please feel free to do the rest via the velero cli if you prefer.
Browse over to your cluster and go back to the data protection tab. You should be able to see the wp backup.
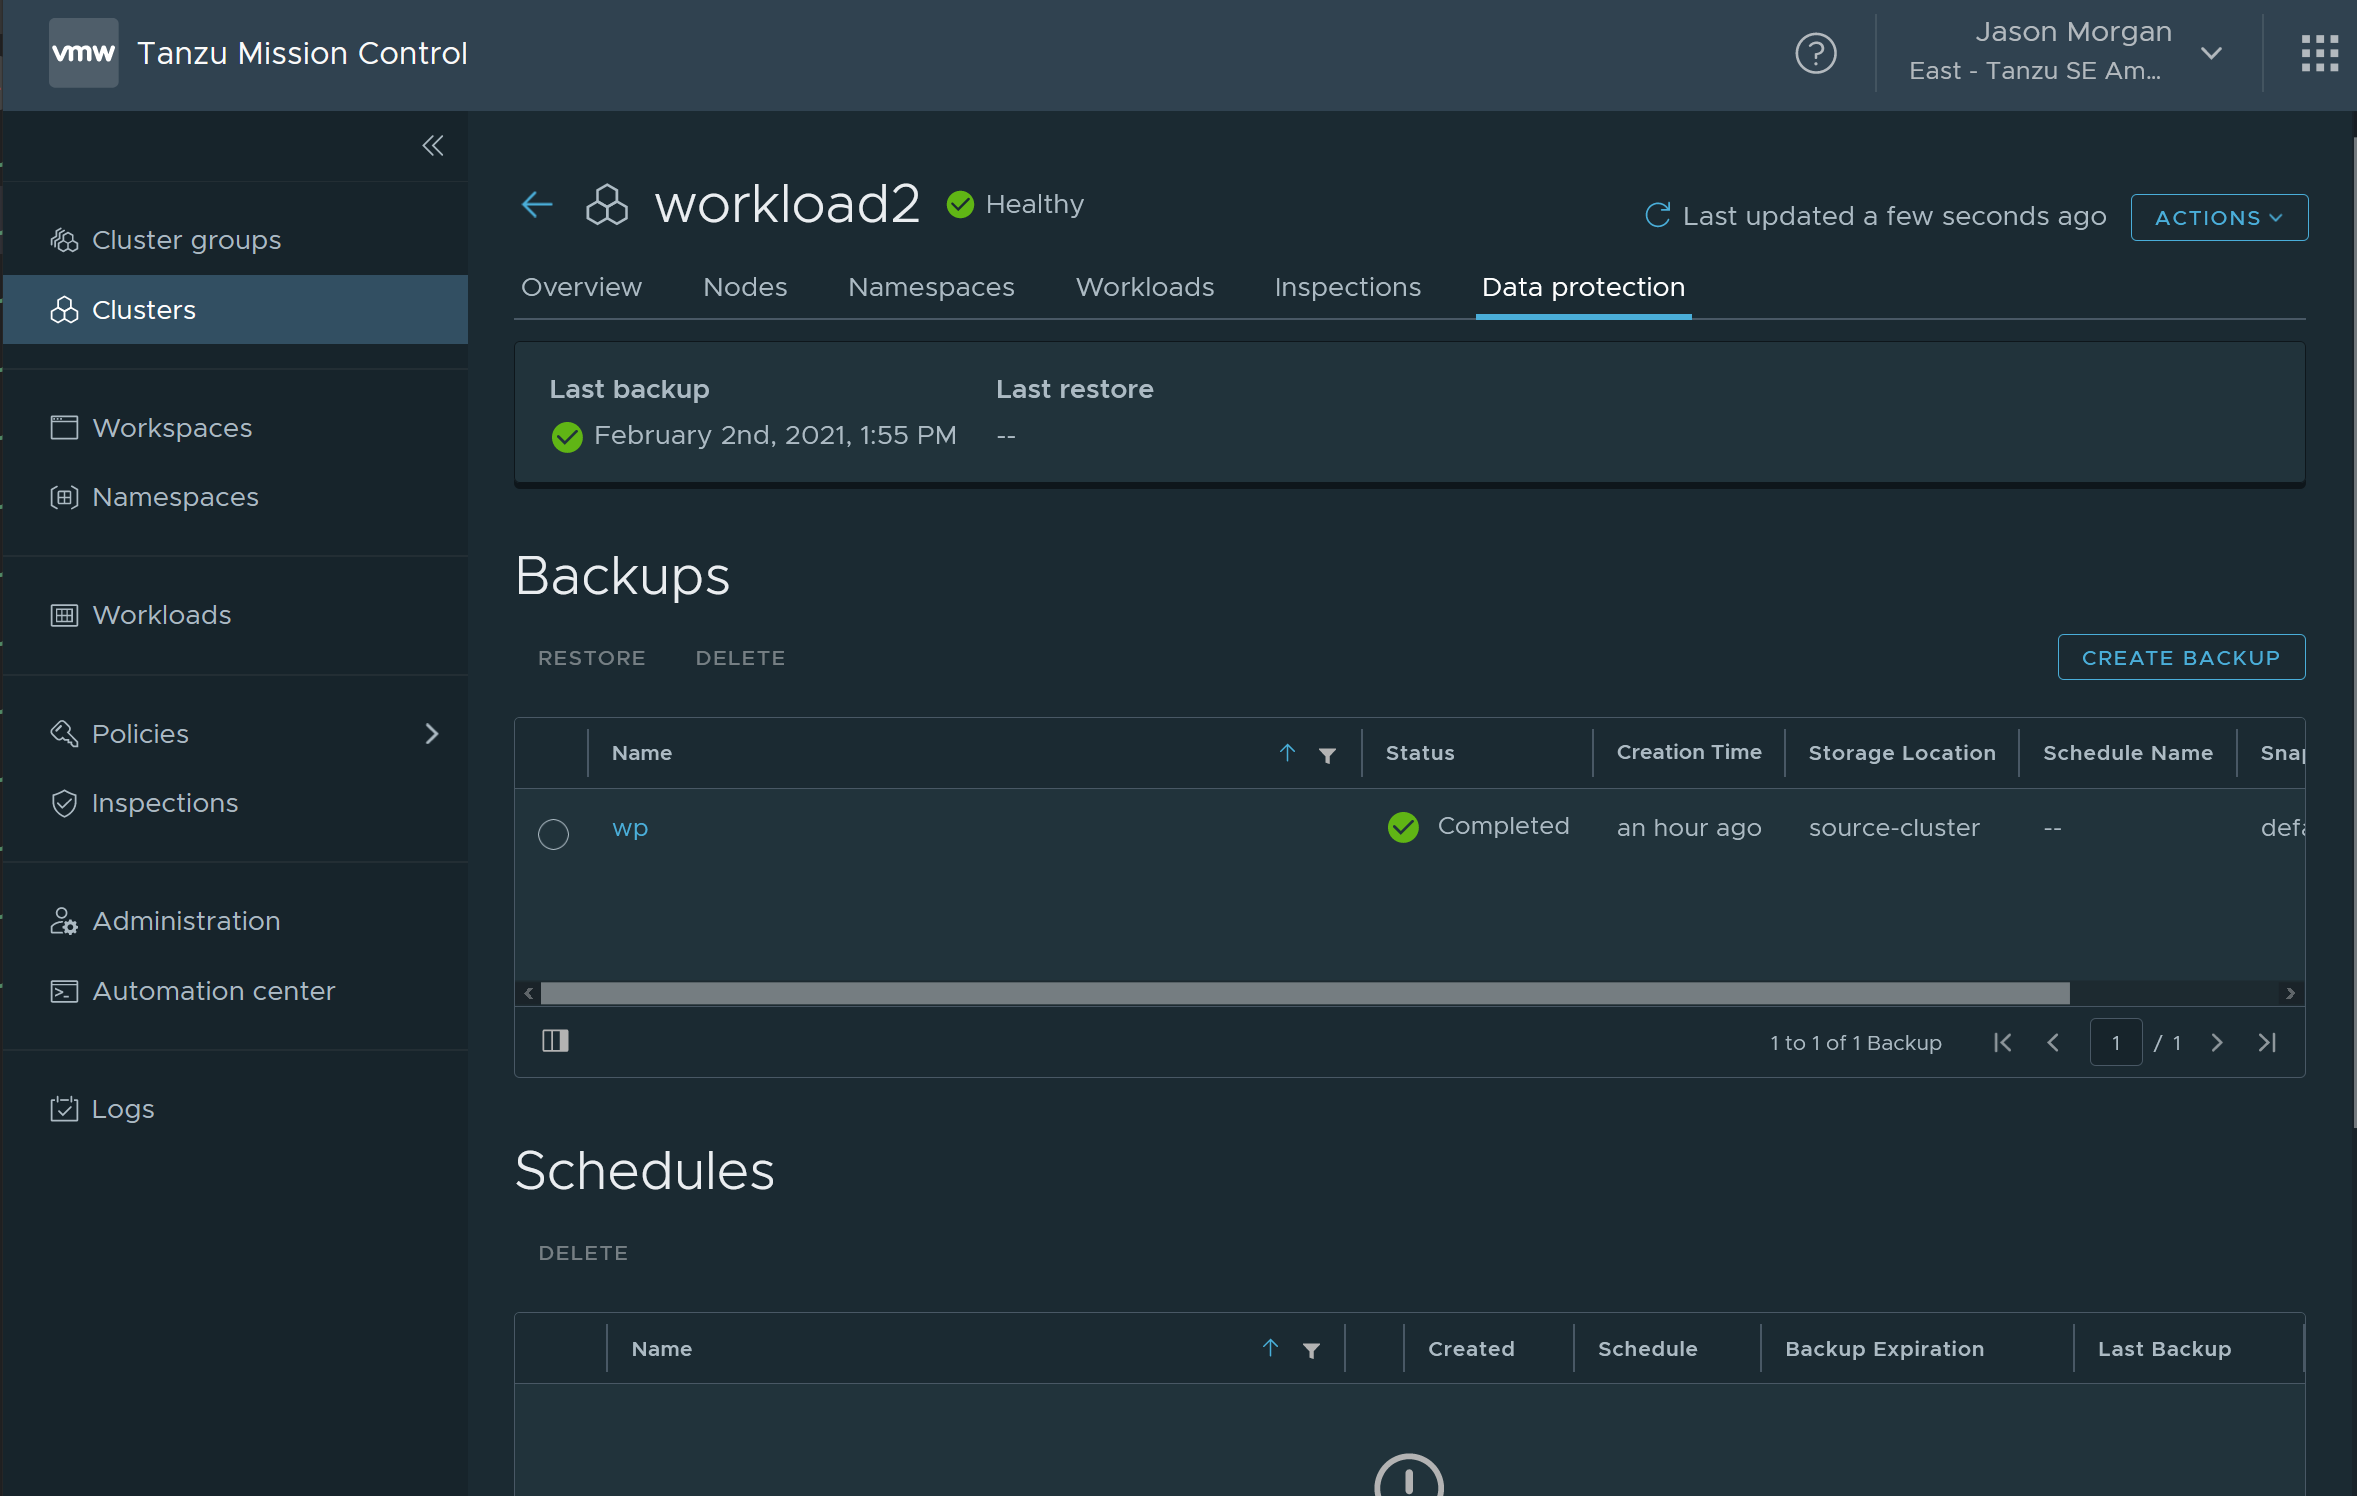
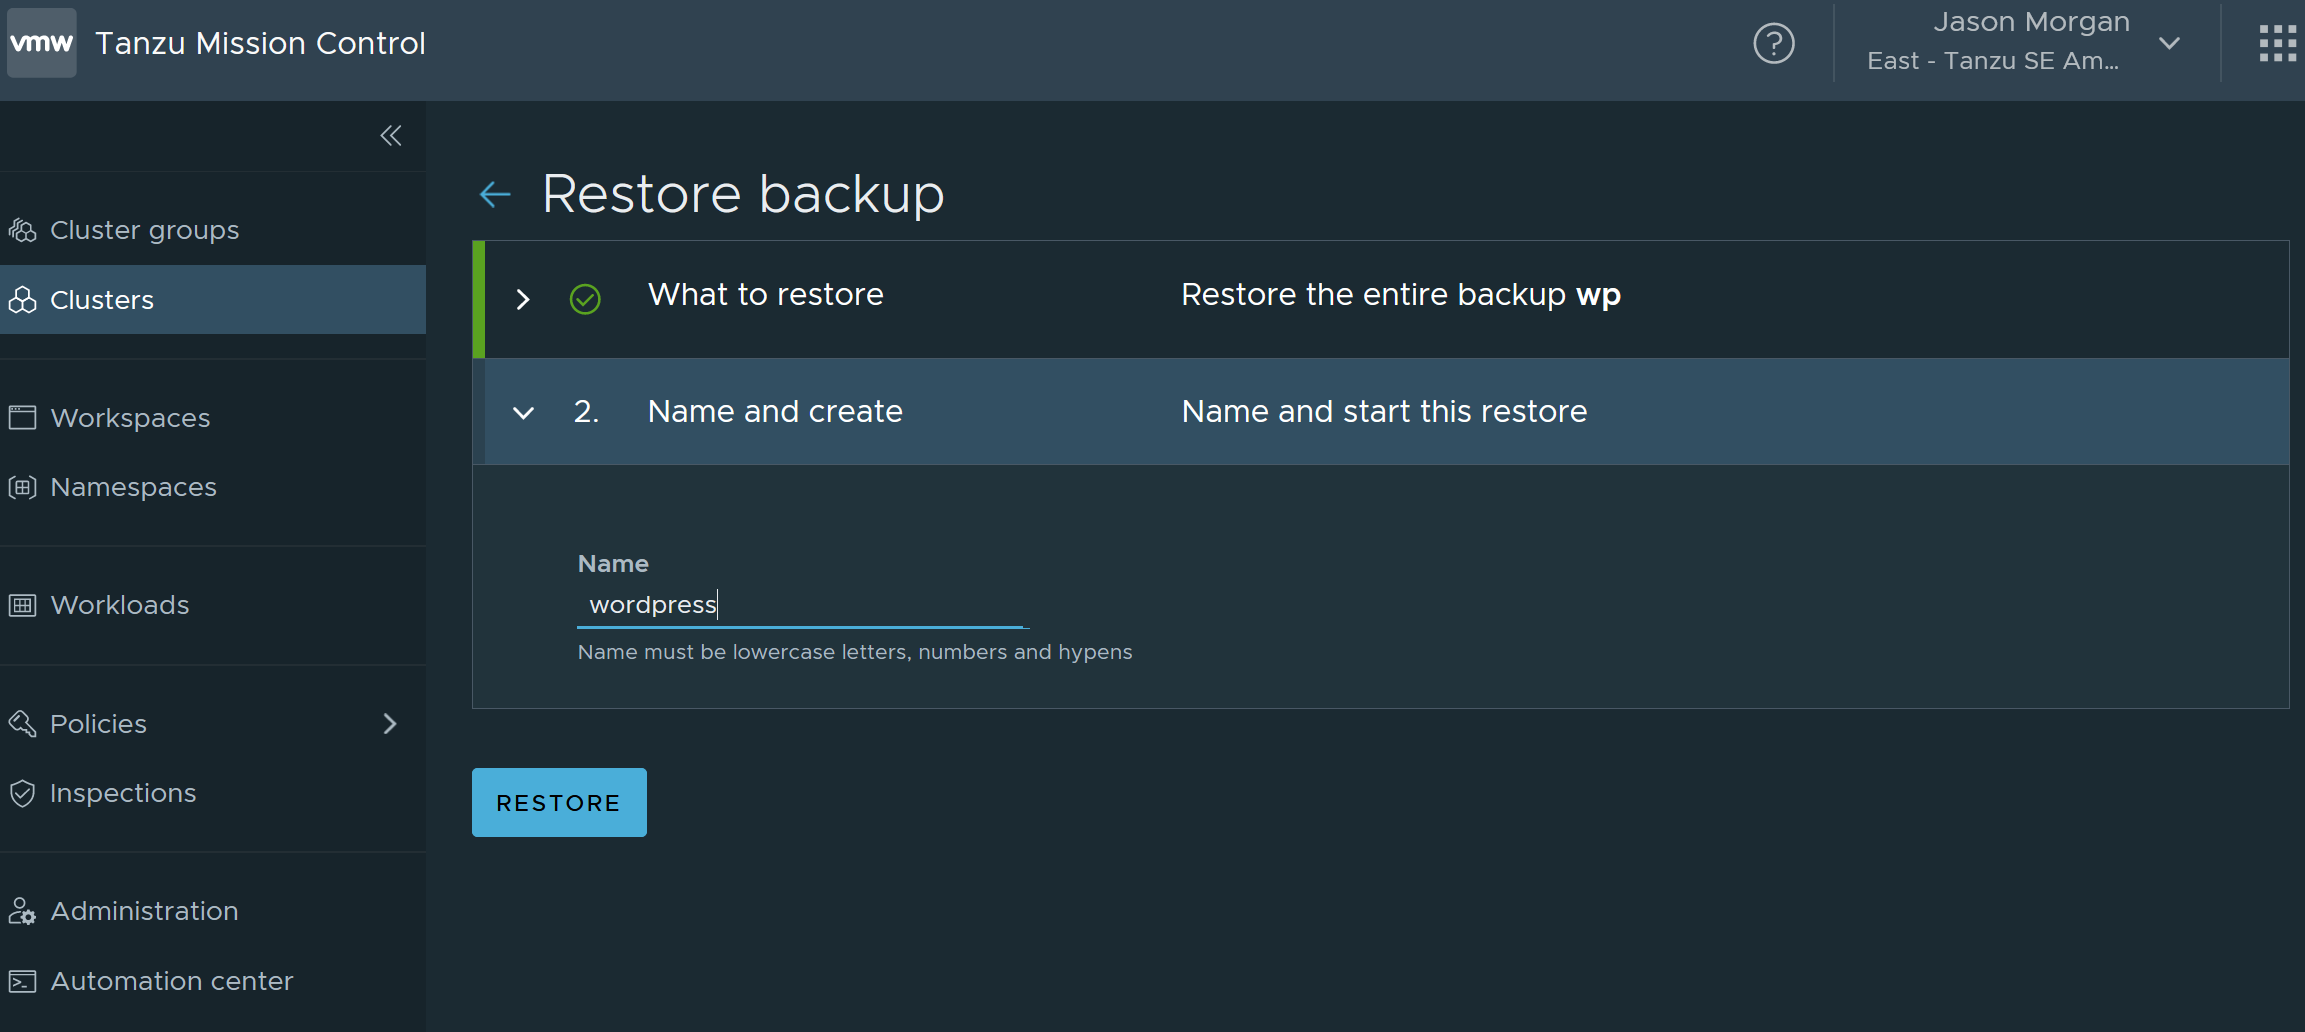
Select the backup and click restore, you’ll see a menu like this:
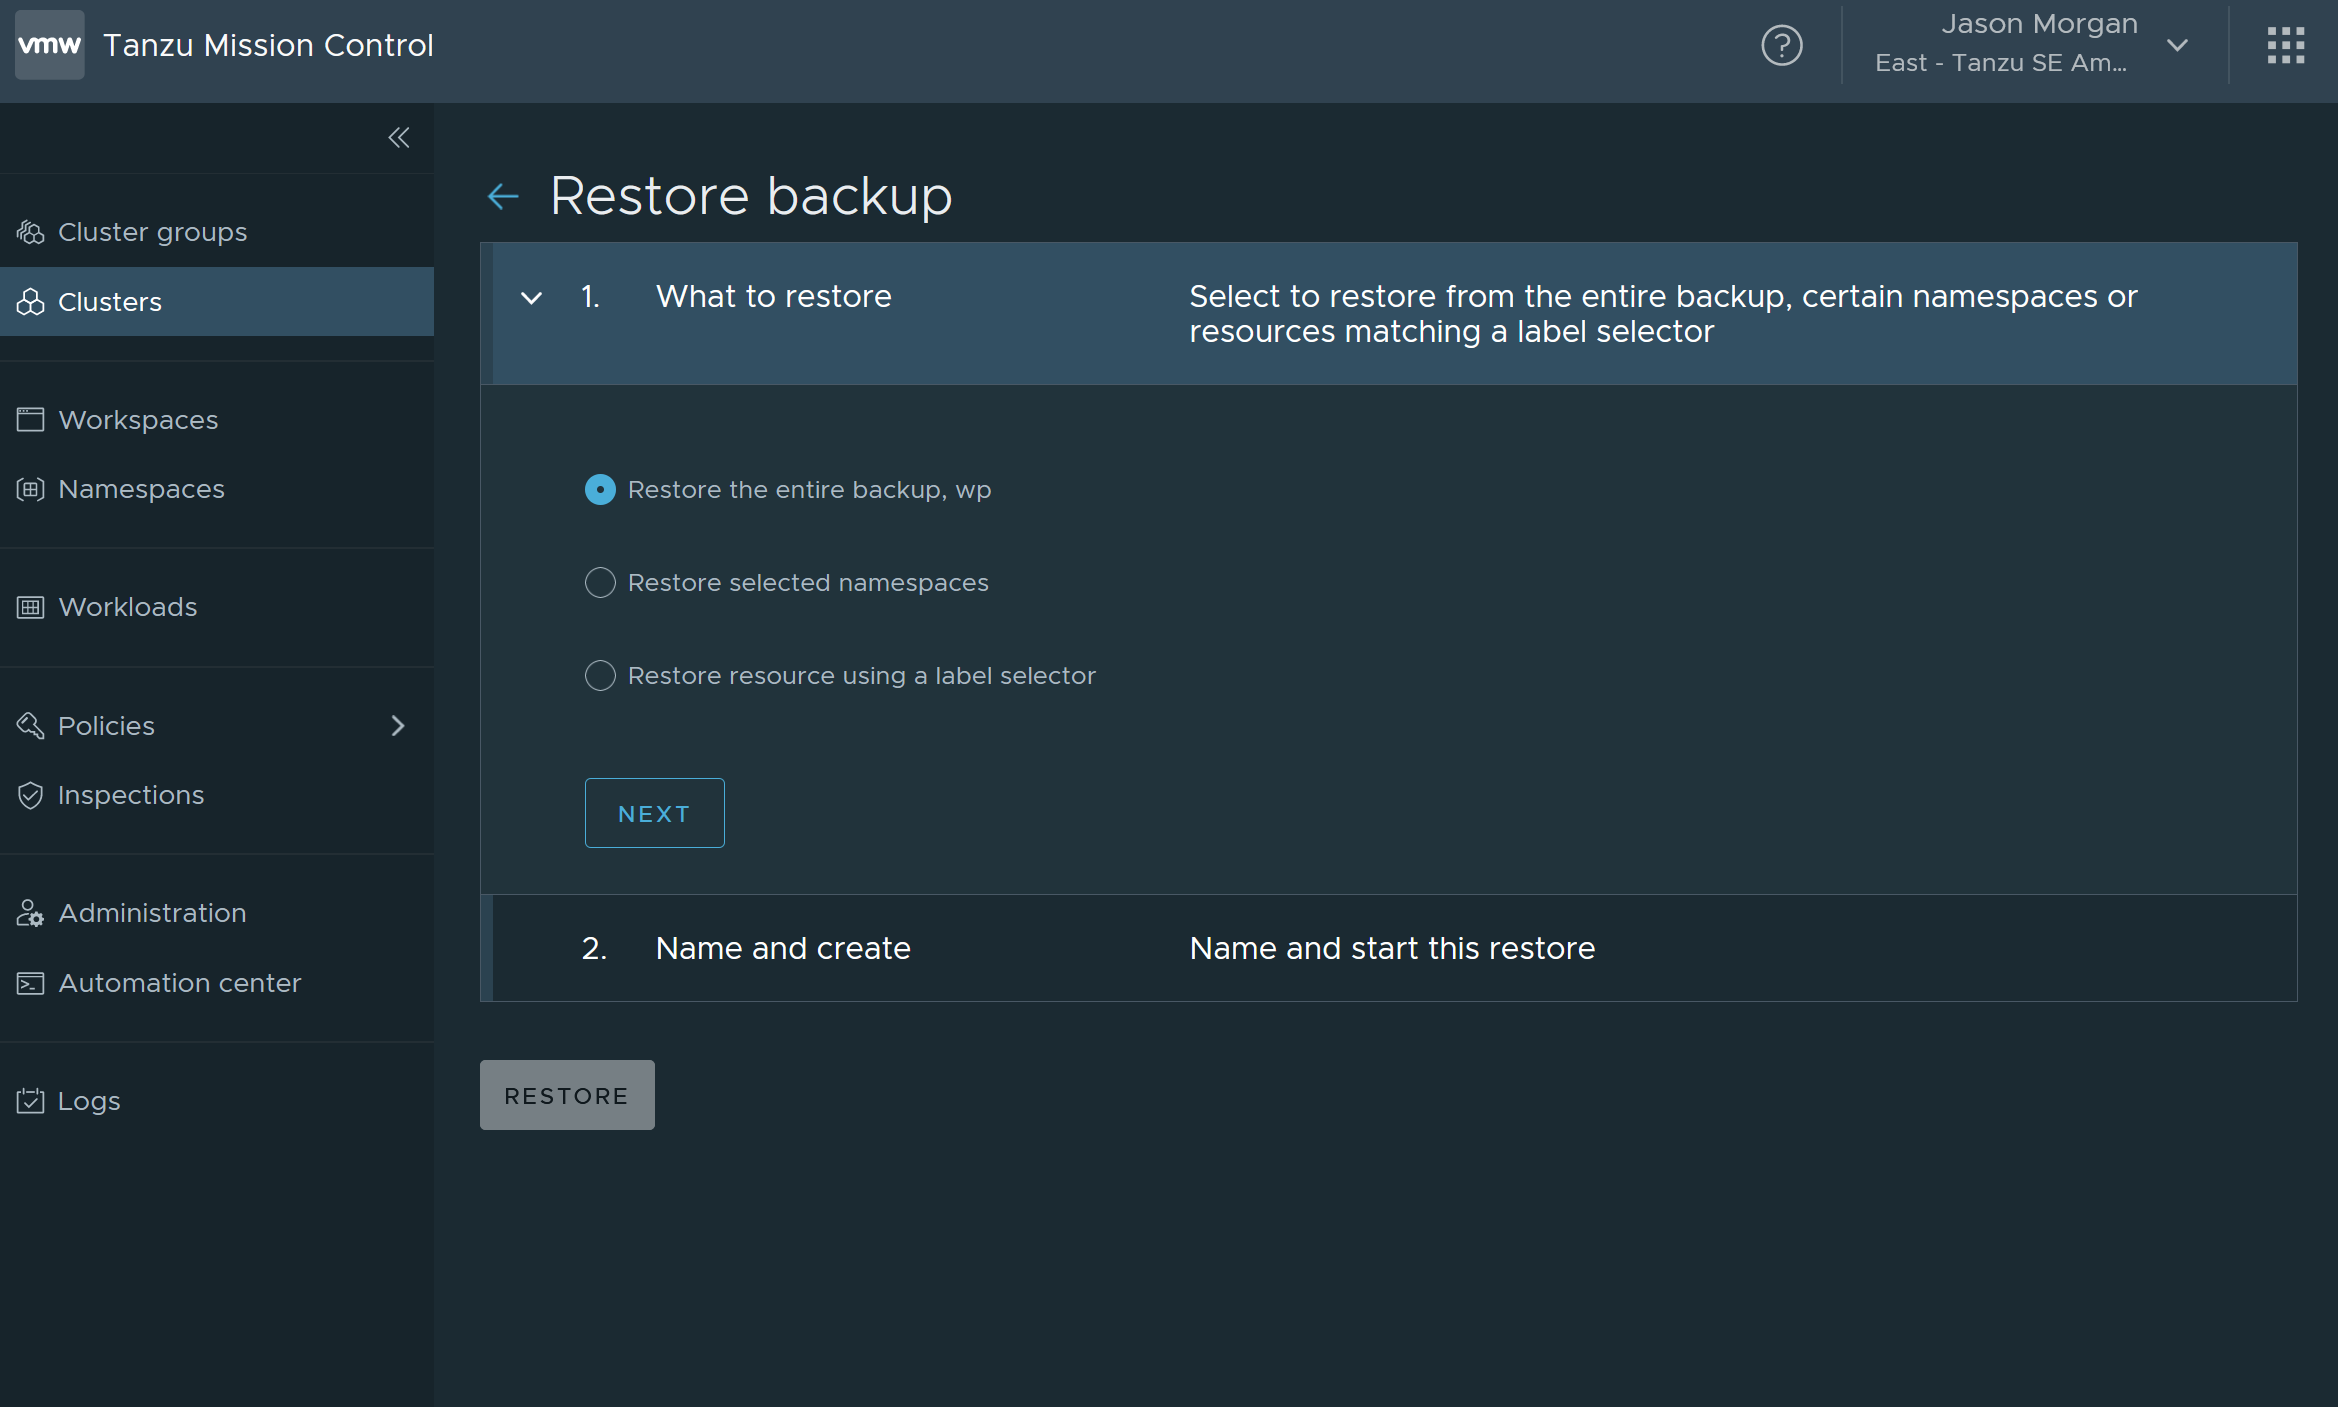
Restore either the entire cluster or the namespace. It doesn’t make any difference for me as I only backed up the namespace.
Now just wait for your restore to complete.
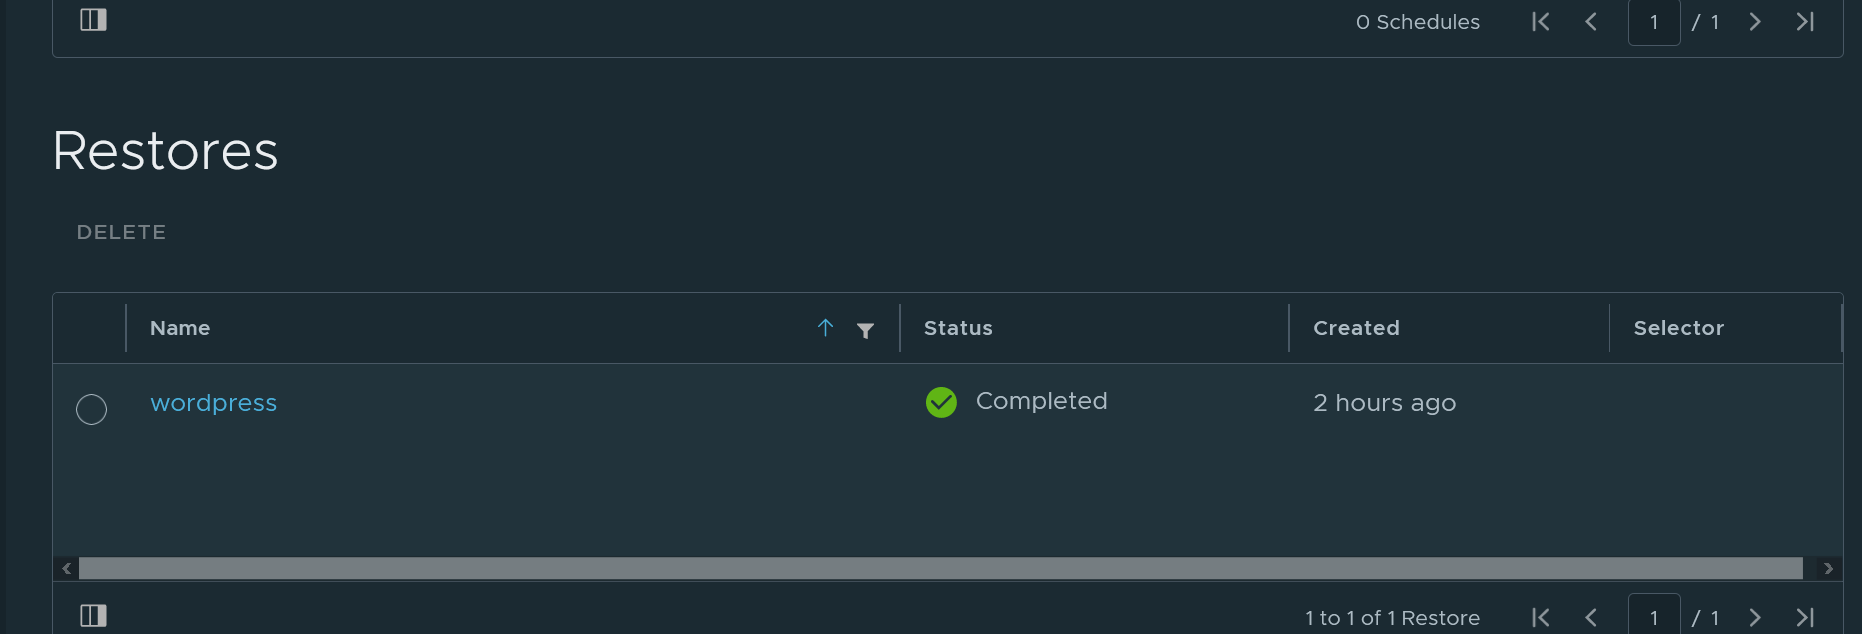
And that’s it! Go peak at your migrated wordpress blog.
Validating
Hop on to the terminal again and ensure you’re working with workload2. You can now run kubectl port-forward svc/new-blog-wordpress 8080:80 -n wordpress and dhe site will be available at localhost:8080.
Wrap Up
With that we’ve walked through the full process of doing a cross cluster restore with Velero and Tanzu Mission Control. I wouldn’t say it’s the easiest process in the world but ti gives you a chance to dive into a bit of how velero works under the hood and if you think this is something TMC should support the folks over at VMware would love to hear from you. Regardless you now have the steps required to do it on your own.
Thanks so much for reading and I’d love to hear any feedback you have, please hit me up on twitter or Linkedin.
Jason